

This Documentation is Being Deprecated
This page is being phased out as part of our documentation reorganization.
Click this card to be redirected to the updated version with the most current information.
If you notice any discrepancies or areas needing improvement in the new documentation, please use the “Report an issue” button at the bottom of the page.
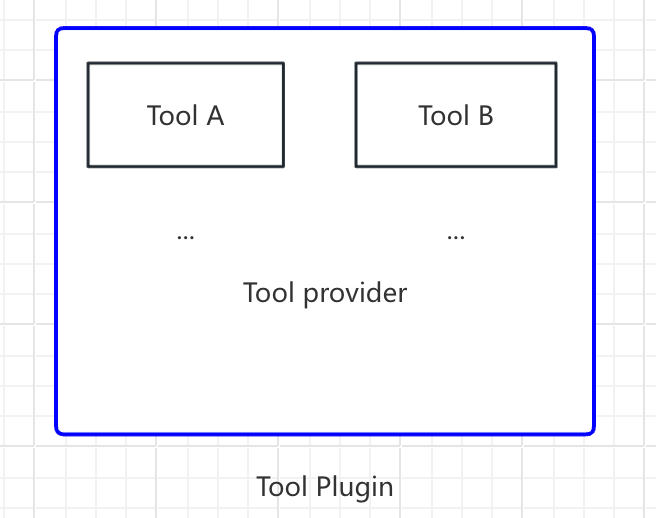
 In this article, a “Tool Plugin” refers to a complete project that includes the tool provider file, functional code, and other related components. A tool provider may encompass multiple Tools (which can be understood as additional functionalities offered by a single tool), structured as follows:
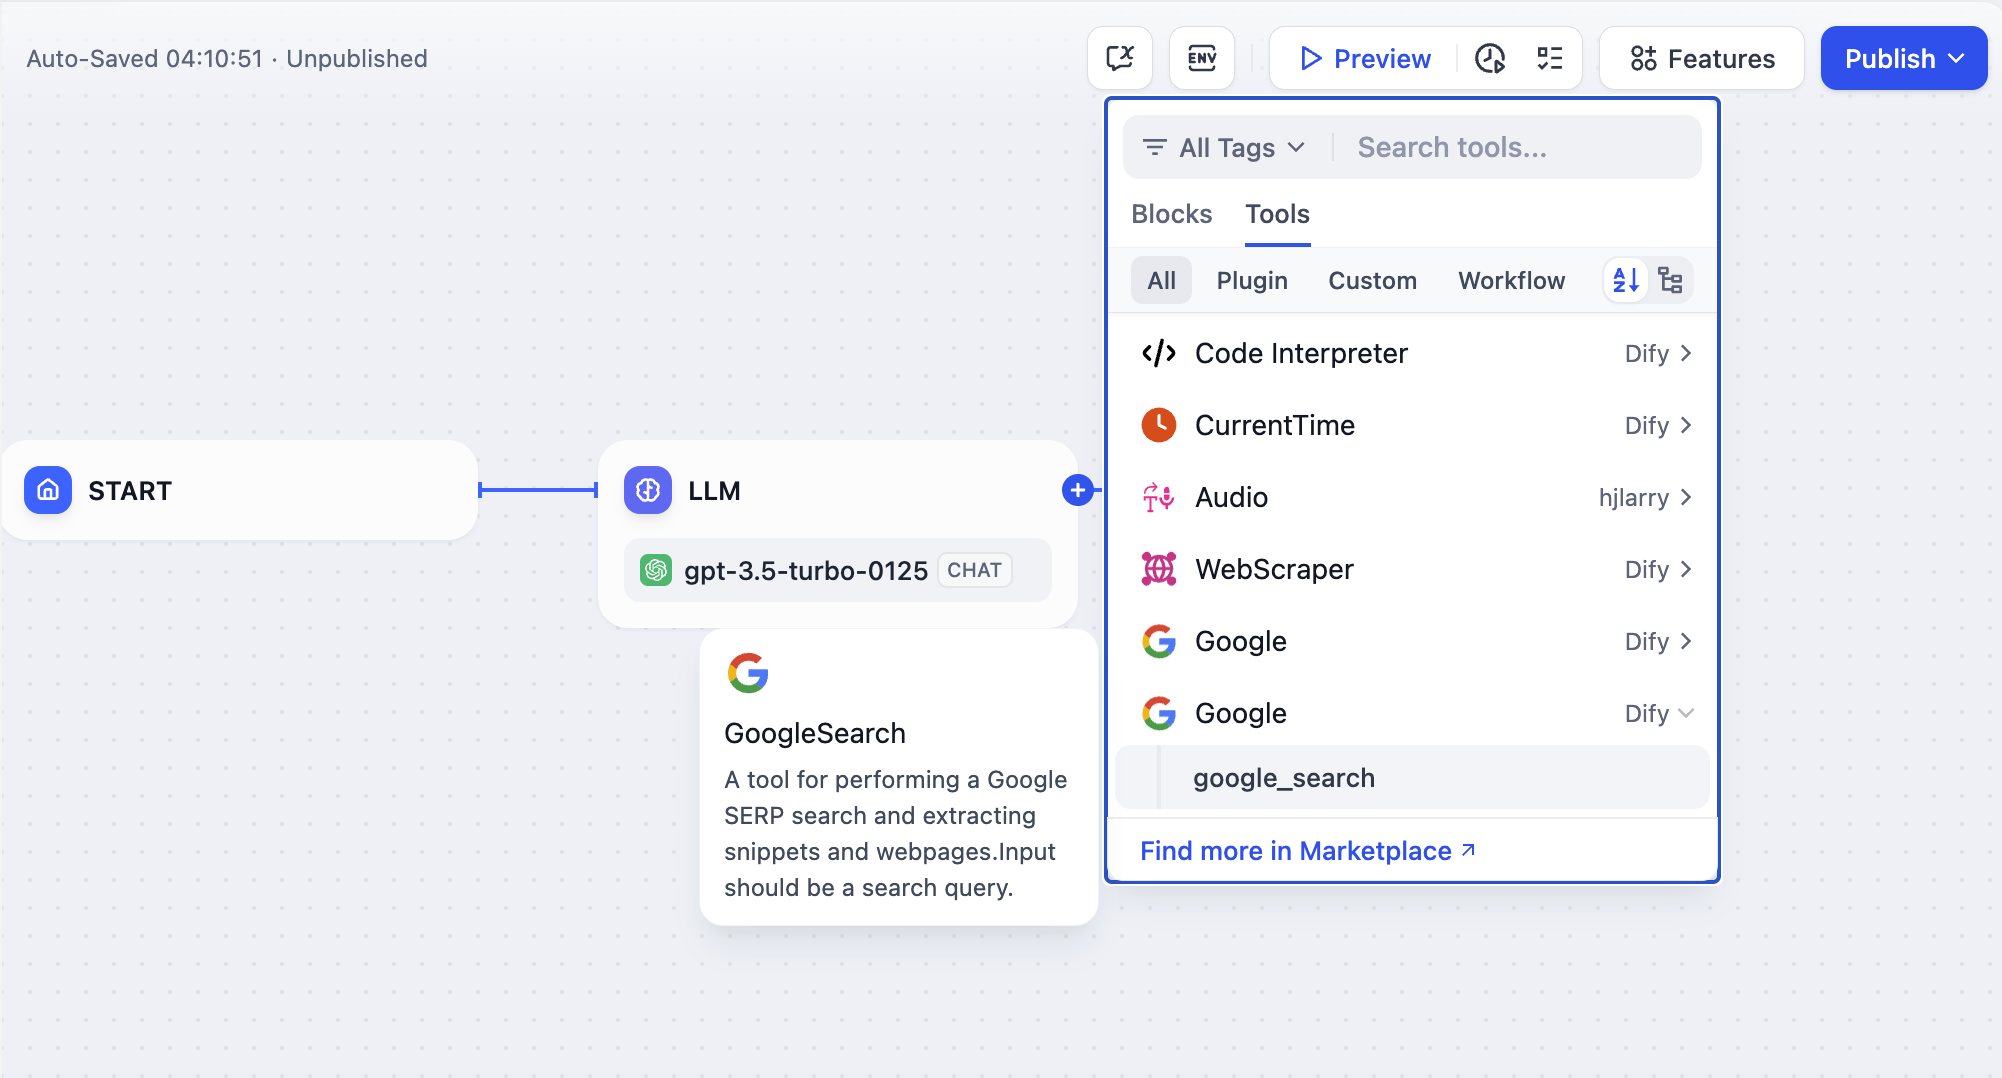
 This article uses
 GoogleSearch as an example of how to quickly develop a tool type of plugin.
Prerequisites
- Dify plugin scaffolding tool
- Python, version ≥ 3.12
Create New Project
Run the CLI tool to create a new dify plugin project:dify and copied it to the /usr/local/bin path, you can run the following command to create a new plugin project:
In the following, the command-line tooldifyis used. If issues occur, please replace thedifycommand with the appropriate path to your command-line tool.
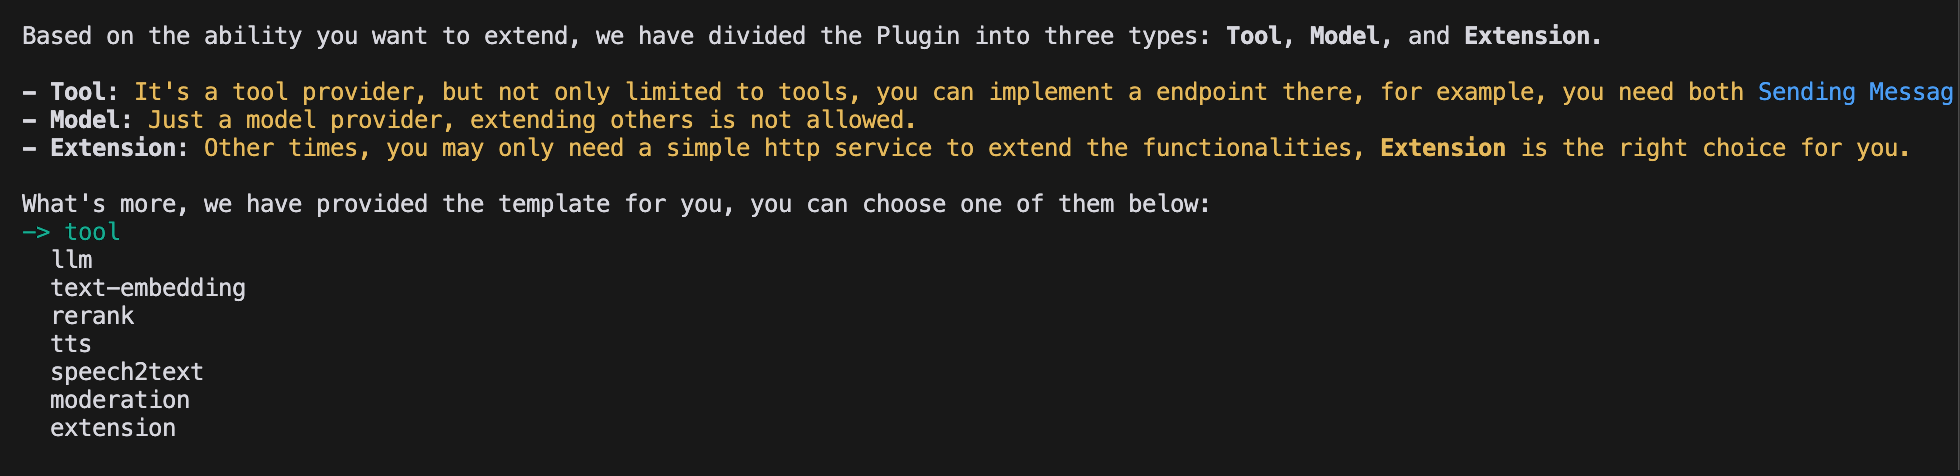
Select plugin type and template
There are three types of plugins: tool, model and extension. All templates within SDK are provided with full code projects. The following part will use the Tool plugin template as an example.If you are already familiar in plugin development, please refer to the Schema Definition to implement various types of plugins.
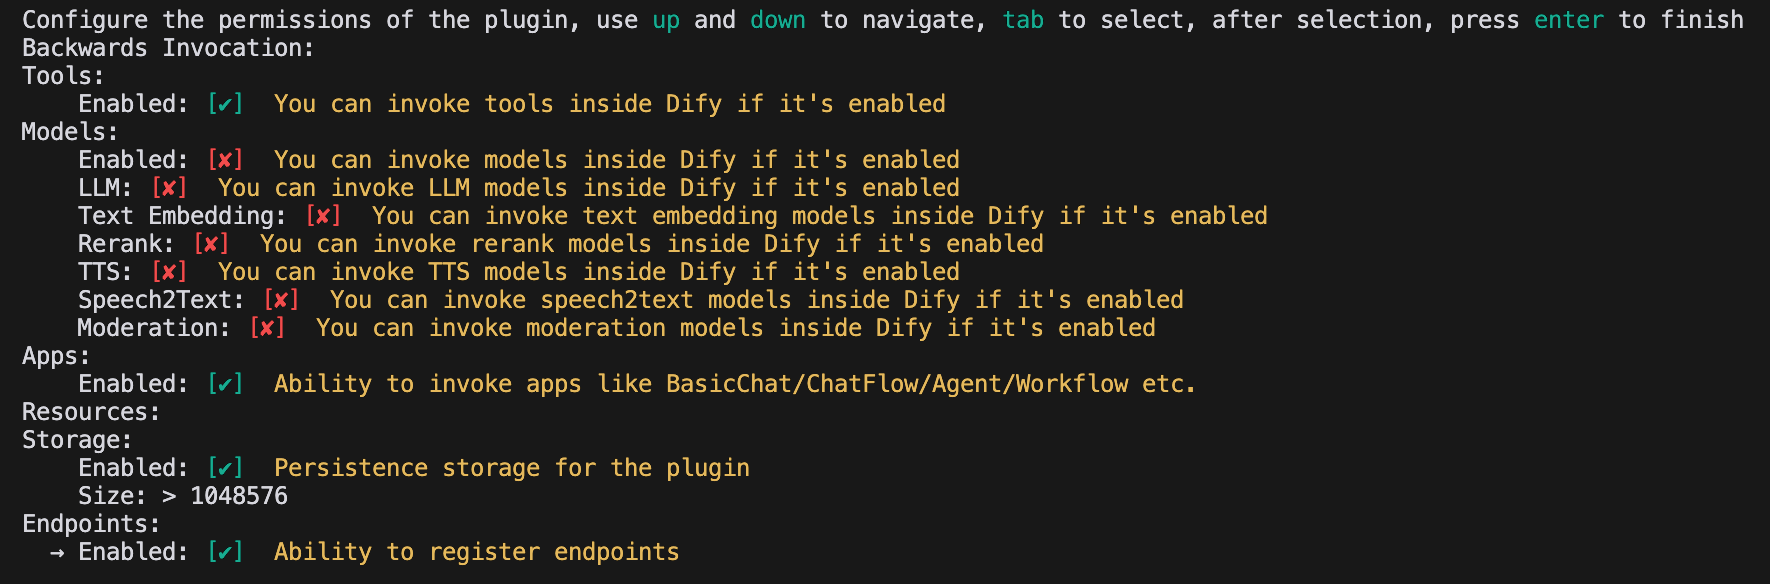
Configuring Plugin Permissions
The plugin also needs to read permissions from the Dify platform to connect properly. The following permissions need to be granted for the example tool plugin:- Tools
- Apps
- Enable persistent storage Storage, allocate default size storage
- Allow registration of Endpoint
Use the arrow keys to select permissions within the terminal and the “Tab” button to grant permissions.After checking all the permission items, tap Enter to complete the creation of the plug-in. The system will automatically generate the plug-in project code.
Developing Tools Plugins
1. Create the tool vendor yaml file
The tool vendor file can be understood as the base configuration entry point for a tool type plugin, and is used to provide the necessary authorization information to the tool. This section demonstrates how to fill out that yaml file. Go to the/provider path and rename the yaml file in it to google.yaml. The yaml file will contain information about the tool vendor, including the provider name, icon, author, and other details. This information will be displayed when the plugin is installed.
Example:
identitycontains basic information about the tool provider, including author, name, label, description, icon, and more.- The icon needs to be an attachment resource, which needs to be placed in the
_assetsfolder in the project root directory. - Tags help users quickly find plugins by category, here are all the tags currently supported.
-
- The icon needs to be an attachment resource, which needs to be placed in the
/tools directory, the full path is below:
google.yaml file needs to use its absolute path in the plugin project.
- Completion of third-party service credentials
credentials_for_provider field to the yaml file.
The full code is below:
- where the
credentials_for_providersub-level structure needs to satisfy the ProviderConfig specification. - It is necessary to specify which tools are included in this provider. This example only includes a
tools/google_search.yamlfile. - For the provider, in addition to defining its basic information, you also need to implement some of its code logic, so you need to specify its implementation logic. In this example, the code file for the function is placed in
google.py, but instead of implementing it for the time being, you write the code forgoogle_searchfirst.
2. Fill out the tool yaml file
There can be multiple tools under a tool vendor, and each tool needs to be described by ayaml file, which contains basic information about the tool, its parameters, its output, and so on.
Still using the GoogleSearch tool as an example, you can create a new google_search.yaml file in the /tools folder.
identitycontains the tool’s basic information, including name, author, labels, description, etc.parametersparameter listname(required) parameter name, must be unique, cannot duplicate other parameter namestype(required) parameter type, currently supports nine types:string,number,boolean,select,secret-input,file,files,model-selector,app-selector, corresponding to string, number, boolean, dropdown menu, encrypted input field, file, file set, model selection, and application selection. For sensitive information, please usesecret-inputtypelabel(required) parameter label, used for frontend displayform(required) form type, currently supports two types:llmandform- In Agent applications,
llmmeans the parameter is inferred by LLM,formmeans parameters that can be preset to use the tool - In workflow applications, both
llmandformneed to be filled in the frontend, butllmparameters will serve as input variables for tool nodes
- In Agent applications,
requiredwhether the field is required- In
llmmode, if a parameter is required, the Agent must infer this parameter - In
formmode, if a parameter is required, users must fill in this parameter in the frontend before starting the conversation
- In
optionsparameter options- In
llmmode, Dify will pass all options to LLM, which can make inferences based on these options - In
formmode, whentypeisselect, the frontend will display these options
- In
defaultdefault valueminminimum value, can be set when parameter type isnumbermaxmaximum value, can be set when parameter type isnumberhuman_descriptionintroduction displayed in frontend, supports multiple languagesplaceholderprompt text for input fields, can be set when form type isformand parameter type isstring,number, orsecret-input, supports multiple languagesllm_descriptionintroduction passed to LLM. To help LLM better understand this parameter, please write as detailed information as possible about this parameter here so that LLM can understand it
3. Preparation of tool codes
After filling in the configuration information of the tool, you can start writing the functional code of the tool to realize the logical purpose of the tool. Creategoogle_search.py in the /tools directory with the following contents.
serpapi and use self.create_json_message to return a string of json formatted data. For more information on the types of data returned, you can refer to the tool documentation.
4. Completion of tool vendor codes
Finally, you need to create a vendor code implementation code that will be used to implement the vendor’s credential validation logic. If the credential validation fails, theToolProviderCredentialValidationError exception will be thrown. After successful validation, the google_search tool service will be requested correctly.
Create a google.py file in the /provider directory with the following code:
Debugging Plugins
Dify provides remote debugging method, go to “Plugin Management” page to get the debugging key and remote server address. Go back to the plugin project, copy the
 .env.example file and rename it to .env. Fill it with the remote server address and debugging key.
The .env file:
python -m main command to launch the plugin. You can see on the plugin page that the plugin has been installed into Workspace. Other team members can also access the plugin.

Packing Plugin
After confirming that the plugin works properly, you can package and name the plugin with the following command line tool. After running it you can find thegoogle.difypkg file in the current folder, which is the final plugin package.
Publishing Plugins
You can now publish your plugin by uploading it to the Dify Plugins code repository! Before uploading, make sure your plugin follows the plugin release guide. Once approved, the code will be merged into the master branch and automatically live in the Dify Marketplace.Exploring More
Quick Start:- Develop Extension Type Plugin
- Develop Model Type Plugin
- Bundle Type Plugin: Package Multiple Plugins
Edit this page | Report an issue